
Margins in Google Docs help define the amount of blank space between the edges of your document and the text. The default margin size is 1 inch all around, but you may want to adjust margins for different needs like printing or formatting an ebook.
Luckily, Google Docs makes it easy to customize your document’s margins in just a few clicks. In this guide, I’ll show you how to view, change, and troubleshoot margins in Google Docs.
Viewing Current Margins in Google Docs
Before changing margins, it’s helpful to know what your current settings are. Here’s how to check margins in Google Docs:
- Open the Google Doc and click File > Page setup.
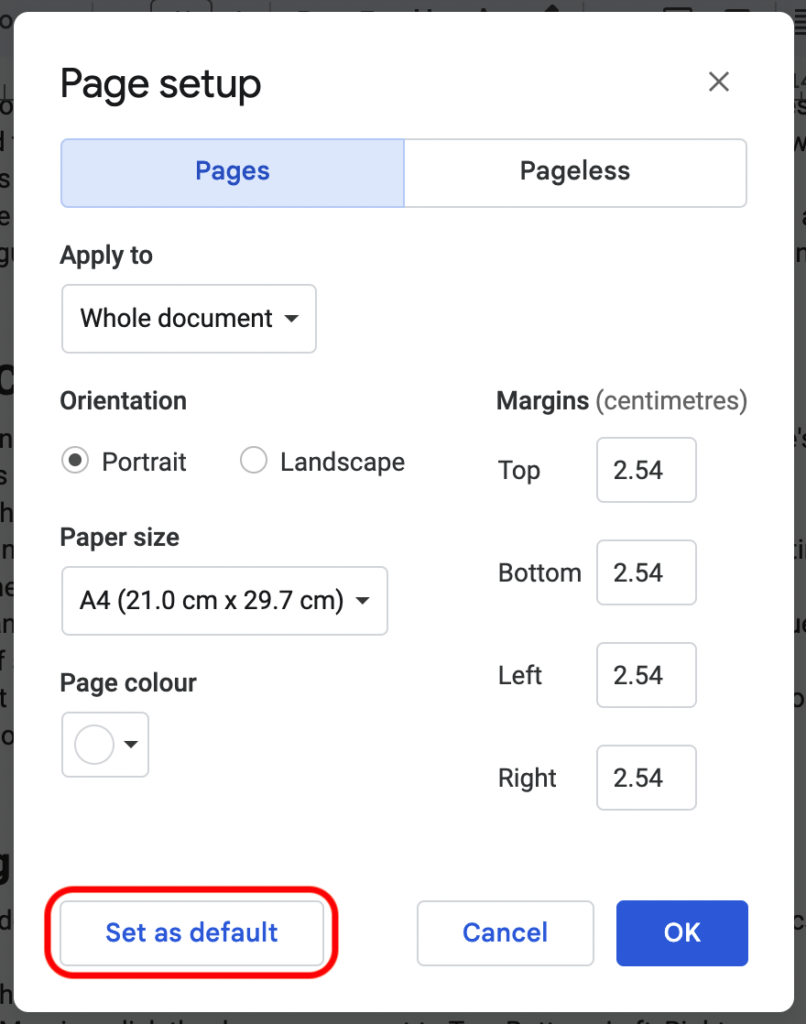
- Look under the Margins section to view the current margin size for the entire document and sections.
- You can also click on individual page numbers in the sidebar to view unique margin sizes if set.
- Default margins will be 2.54 cm (1 inch) for new Docs. Any customizations will display for specific pages or sections. Centimetre and Inch convection totally depends on how you have selected the language of your Google account.
- Click Okay to save the new margins for the particular doc.
Changing the Default Margin Size
Adjusting the default margin size will alter the starting size for all new Google Docs you create.
- From the menu, select File > Page setup.
- Under Margins, check the Top, Bottom, Left, Right inputs.
- Enter your desired default margin size in centimetres/inches.
- Click Set as default to save the new default margins for all future docs.
You can also set custom defaults for all new documents by saving a template with your ideal margins already set.
Setting Custom Margins in Google Docs
For individual documents, you can customize the margins for certain sections or pages that need unique formatting:
Section-Specific Margins
- Highlight the section you want to adjust.
- Go to File > Page setup and enter margin sizes under “Section Header/Footer”
- Click Apply to adjust just that section’s margins.
Page-Specific Margins
- Click on the page number in the sidebar to access options for that page.
- Under Page-specific margins, enter desired size.
- Click Apply to adjust only that first page. Repeat for other pages as needed.
You can even set different Inside and Outside margins for odd and even pages for book-style formatting.
Creating Reusable Margin Presets
For common margin sizes you use repeatedly, save these as presets for quick access:
- Set margins to desired sizes in Page Setup.
- Click “Save as preset” and name your preset e.g. “Printing – 0.5in Margins”.
- To apply, choose your saved preset from the dropdown menu.
Handy presets to create include small margins for printing or wide margins for e-book formats.
Troubleshooting Margin Changes
If your margin changes don’t seem to apply or display correctly:
- Double check that you clicked “Apply to whole document” or the specific pages/sections you want.
- Watch for messages about alignment or size limits for the document width.
- You may need to undo other alignment or justify settings to allow margin changes.
- Still not working? Reset to default margins and try reapplying your settings.
Changing up margins in Google Docs is simple once you know where to look. Follow this guide to take control of margins for your documents and tailor them to your needs.
Let me know if you need help adjusting margins for print or digital formats. I’m happy to provide templates and presets to make it easier to get the margins you want in Google Docs.